Guides / Finishing
Mirror Polishing Aluminium and Brass Audio Parts
October 21, 2026
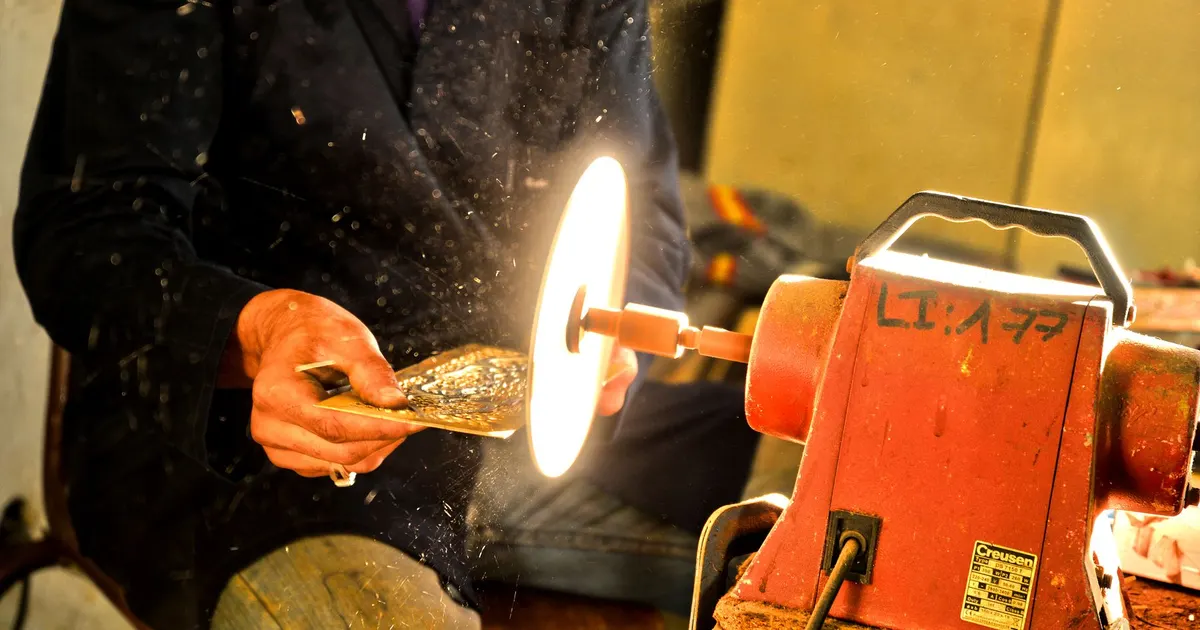
A mirror finish is the most demanding surface you can put on an audio part, and the most expensive per square centimetre. It also reveals every fault in the metal underneath. Shops quote it by hand-labour hours, not by machine time, which is why the numbers surprise first-time buyers.
What a mirror finish is
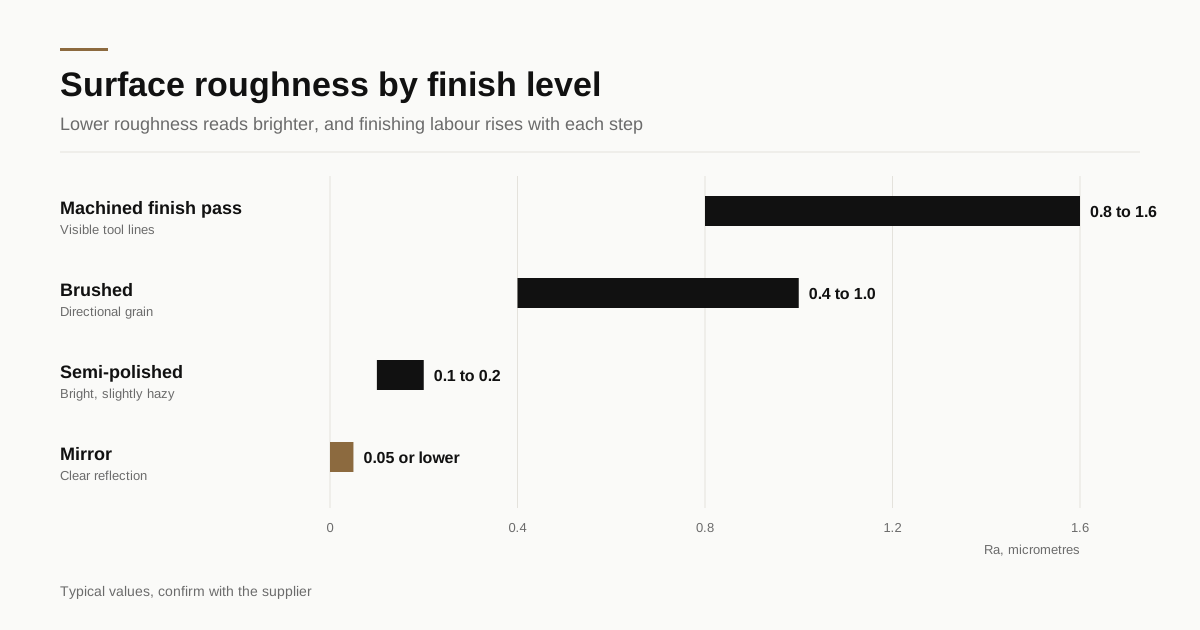
A surface looks like a mirror when its roughness is smaller than the wavelength of visible light, so reflected light stays organised instead of scattering. In practice that means a roughness of roughly Ra 0.05 µm or lower. A machined surface from a good finishing pass sits at Ra 0.4 to 1.6 µm, which is a satin or matte look. Closing that gap takes several mechanical steps.
Where a surface falls between satin and mirror, shops use words like semi-gloss or high polish. Those terms mean different things at different shops, so a physical sample matters more than any word. The surface-roughness side of this is explained in surface roughness on cosmetic faces.
The steps
A typical polishing sequence for aluminum or brass looks like this. Exact grits and compounds vary by shop.
- Start from a clean machined face. Any tool marks, pits or inclusions under the surface will survive to the end. Polishing hides roughness but not depth.
- Sand or grind with a coarse abrasive, around 180 to 320 grit, to remove tool marks.
- Work through finer grits in steps, such as 400, 600, 800 and 1200, changing direction each time so the previous scratches are removed completely.
- Buff with a cutting compound on a firm wheel. A tripoli-type compound removes the final scratches and brings up a first shine.
- Colour buff with a fine compound on a soft wheel. A rouge-type compound gives the final gloss.
- Clean with a solvent or detergent to remove compound, which clogs edges and holes.
- Protect with a clear lacquer, a thin clear anodize, a plating or a coating, depending on the metal and the use.
Each step takes a fixed amount of time and cannot be skipped. A shop that quotes mirror polish at the price of a brushed finish is quoting a different surface.
Typical figures
These are typical values, not promises. Confirm with the shop quoting your part.
| Quality level | Typical roughness | What it looks like |
|---|---|---|
| Machined, finish pass | Ra 0.8 to 1.6 µm | Visible tool lines, satin |
| Brushed | Ra 0.4 to 1.0 µm | Directional grain, soft sheen |
| Semi-polished | Ra 0.1 to 0.2 µm | Bright, slightly hazy reflection |
| Mirror | Ra 0.05 µm or lower | Clear reflection, no visible lines |
| Relative labour | 1x, 2x, 4x, 8x or more | Rises with each step up |
The labour row is the real pricing driver. Going from brushed to mirror often multiplies finishing labour several times over.
Aluminum and brass behave differently
Aluminum is soft and polishes quickly, but it gouges easily and holds scratches. It can show orange peel, a dimpled surface that appears when the metal is over-polished and the grain structure shifts. Material choice matters: a clean wrought alloy polishes better than a casting, and some alloys show streaks or fine pits that show up only at mirror level. The alloy side of this is in aluminium alloys for anodized audio parts.
A bare polished aluminum surface oxidises within minutes to a thin invisible film and dulls over weeks. The protective options are:
- Clear lacquer or powder clear coat. Cheap and fast, but soft and prone to chipping. It changes the depth of the reflection slightly.
- Bright anodize. A thin, clear anodic coating on a bright-dipped surface keeps the shine and adds hardness. It must be done by an anodizer who understands bright work, and the coat should be thin, otherwise the reflection turns hazy.
- No coating. Accepted only for display pieces or limited editions that will be handled with gloves.
Brass polishes beautifully and tarnishes quickly. A freshly polished brass knob looks warm and golden, then shifts to brown within weeks in contact with skin. A clear lacquer slows this, though it wears off at touch points. Plating with nickel, or a vapour-deposited clear coating, protects better and changes the colour. The rules and traps for these alloys are covered in brass and copper audio parts.
What polishing does to the geometry
Buffing is a material-removal process, and it does not remove material evenly.
- Edges and corners round off. A wheel removes metal fastest where the part meets it at a sharp edge. A crisp 0.5 mm chamfer can lose its definition. If the design depends on a sharp edge, polish before the final chamfer, or make the chamfer by a separate operation. A bright chamfer with a mirror face is a combination covered in diamond cut chamfers on audio panels.
- Flat faces get waves. A large flat surface polished by hand develops a faint ripple, visible as distortion in the reflection. Larger faces are polished on lapping or belt equipment, which is more even.
- Holes and recesses are hard to reach. Inside corners and small holes keep their machined finish unless the shop uses small wheels or hand work. Specify the polished area clearly and say that hidden areas can stay machined.
- Tolerances shift. A pocket or a hole edge can grow by several hundredths of a millimetre. Allow for this on mating faces.
For parts like knobs and cups, a lathe-turned surface is often polished while spinning, which gives round, even results. The note on CNC volume knob manufacturing explains how that flows from the turning step.
Where polishing sits in the process order
The order of operations decides whether the shine survives. Machining comes first, then any heavy deburring, then polishing, then cleaning, then the protective coat. Engraving, threading and hole work should finish before polishing where possible, because a tap or a drill after polishing can leave a scratch or a chipped edge on the mirror.
Two traps show up often. If a part is polished and then sent for anodizing, the anodizer’s standard etch can frost the surface and undo days of work. Tell the anodizer that the part is a bright finish and ask about the process before the parts are sent. And if the polished part is then assembled by hand, fingerprints and tool slips become the main source of rejects, so gloves and soft fixtures belong in the assembly plan.
Judging a mirror finish
Mirror quality is judged under controlled light. Three checks are common.
- Reflection test. Hold the part under a ceiling light or a window and look at the reflection of straight lines. A wavy line means a wavy surface.
- Angle test. Tilt the part. Scratches that disappear face-on can show at a shallow angle.
- Edge and corner check. Look at the transition between the polished face and an adjacent surface. This is where polishing compound builds up and where edges round off.
Agree the viewing conditions in advance, in line with the notes on cosmetic inspection lighting and viewing distance. Without agreed conditions, the same part can pass at one shop and fail at another.
Cost and quantity
Mirror polishing is labour first. Even with good tooling, each part passes through a skilled operator several times. At low volume the price per part is high, and it does not fall much with quantity, because the labour does not scale the way machine time does. A run of 300 pieces costs nearly 300 times the labour of one piece.
Three decisions reduce cost without hurting the look. Polish only the faces that are seen. Choose a semi-polished finish where a full mirror would be wasted. And use a material that polishes well from the start, to reduce the number of steps. The price logic across the whole part is in what an amplifier chassis costs to manufacture, and a finishing-heavy part pushes that finishing line up further.
What to put on the drawing and in the RFQ
- Which faces are mirror polished and which are not
- The roughness target or, better, a reference sample
- Edge condition: sharp, chamfered or radiused, and whether chamfers are polished
- Protection: lacquer, clear anodize, plating or none
- Viewing condition for acceptance
- Individual packing, since a mirror finish scratches in transit
- A first article before the run
A reference sample is worth more than any number. If you have a part that you like, send a photo and, if possible, the physical part to the shop through the RFQ process. The finish spec builder helps assemble the written side.
When the drawing and sample plan are ready, send the RFQ and we match it with up to 3 shops that do hand and machine polishing, with a reply within 24 business hours.
Frequently asked questions
Can aluminum be polished to a true mirror?
Yes, with enough steps and good material, but it stays softer than brass or steel and marks easily. A mirror on aluminum usually needs a clear protective coating or a thin bright anodize to survive handling. Without protection it scratches and clouds in normal use.
Why does brass lose its shine so quickly?
Brass tarnishes as copper in the alloy reacts with air and skin oils. A bare polished brass part dulls within days to weeks. Hi-fi brands that want lasting shine on brass use a clear lacquer, a plated layer or a vapour-deposited coating, and accept a different look.
Does mirror polishing change the dimensions of a part?
Slightly, and not evenly. Buffing removes metal fastest at edges and corners, so sharp edges round off and flat faces can develop a subtle wave. Parts with tight tolerances or sharp chamfers need polishing allowance in the design and a check afterwards.
Need a quote for this part?
Send the drawing. We match you with up to 3 shops and reply within 24 business hours.
Get matched with an audio parts shop