Guides / Finishing
Diamond Cut Chamfers on Audio Panels: How the Bright Edge Is Made
October 16, 2026
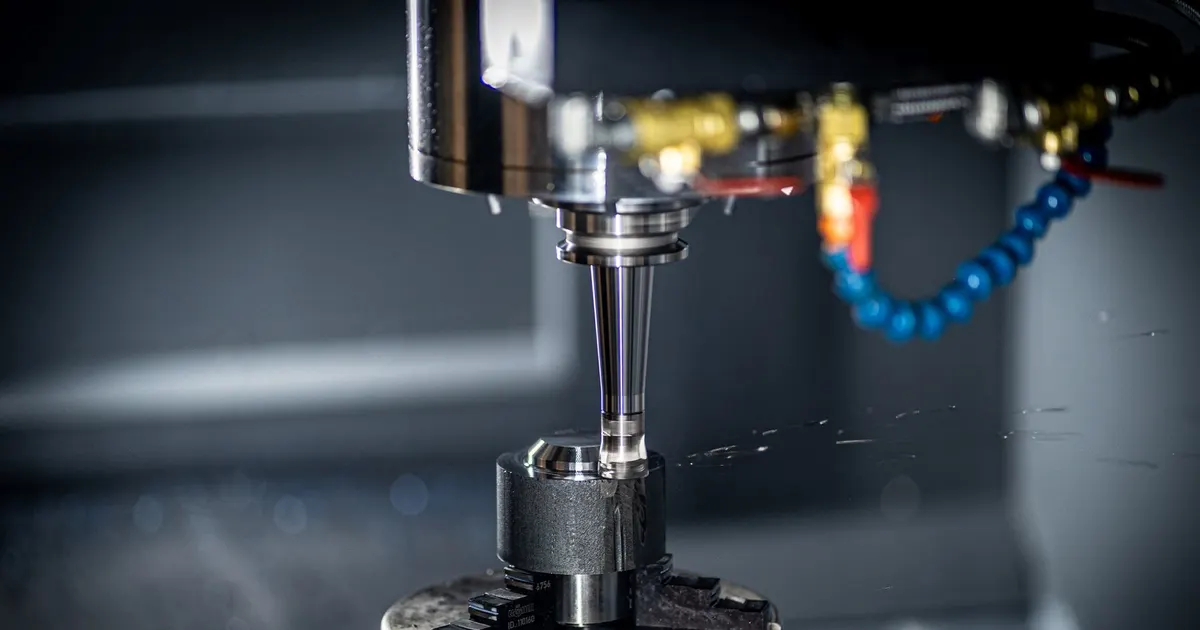
A bright chamfer is the line that catches the light along the top edge of a faceplate. On a hi-fi amplifier or DAC it is often the one detail a buyer notices first, which is why it ends up on the drawing as a note rather than an afterthought. It also looks simple, and that is where orders go wrong.
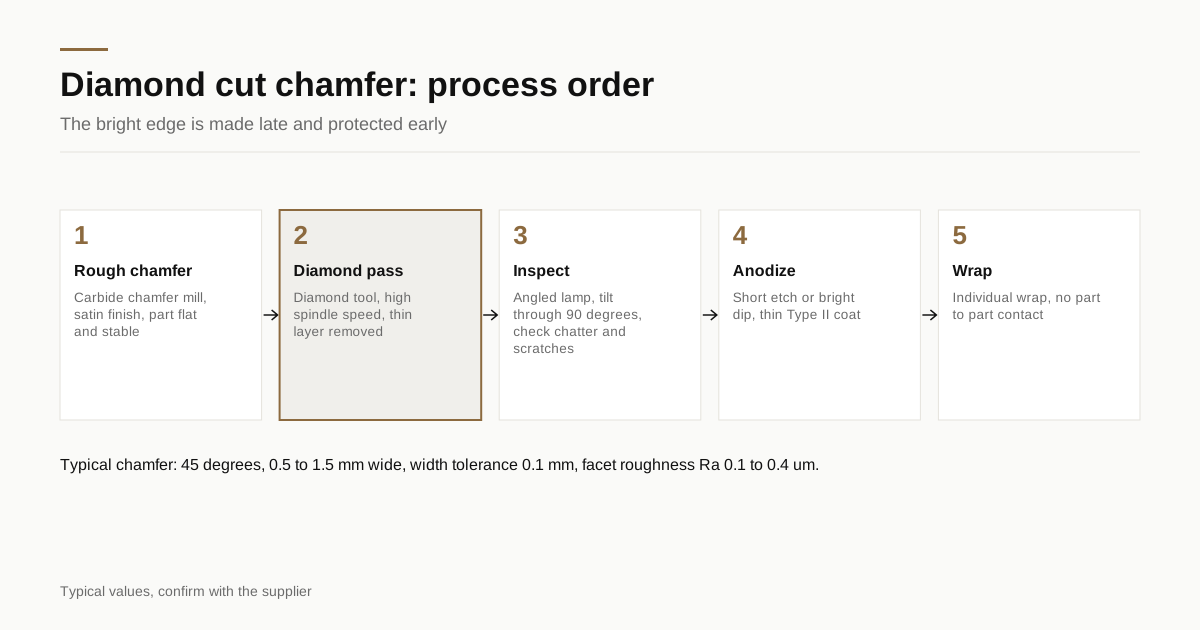
What a diamond cut chamfer actually is
The chamfer is a small angled facet along an edge, most often 45 degrees. On an ordinary part it is made with a carbide chamfer mill during the main machining run. The result is a satin surface with faint tool marks, which is fine for a hidden edge.
A diamond cut chamfer is a second, deliberate pass. A tool tipped with single-crystal diamond or polycrystalline diamond runs at high spindle speed and shaves a very thin layer off the facet. Because diamond is extremely hard and holds a sharp edge, the cut leaves a smooth, flat, mirror-like face that carbide cannot match on aluminum. Light reflects off it cleanly, which is why the edge looks bright rather than satin.
The process works on soft non-ferrous metals: aluminum, brass and copper. It does not suit steel or stainless, because the carbon in ferrous alloys attacks diamond and wears the tool quickly.
Why it is a separate operation on the quote
Shops price the pass on its own for three reasons.
First, it needs a different tool and often a different spindle setup. The tool is expensive and has to be protected, so shops run it only where it is called for.
Second, it is slow to inspect. Every facet has to be looked at under angled light, because a defect that is invisible in daylight shows up as a dull streak once the part is in a lit showroom.
Third, the scrap risk is higher than normal machining. A nick from handling after the cut is hard to rework without re-cutting the whole edge, and re-cutting changes the chamfer width.
Typical figures for an audio panel
These are typical values, not promises. Confirm with the shop quoting your part.
| Item | Typical range | Why it matters |
|---|---|---|
| Chamfer angle | 45 degrees | Matches most faceplate designs, 30 degrees reads as a softer highlight |
| Chamfer width | 0.5 to 1.5 mm | Under 0.5 mm is hard to see, over 1.5 mm starts to look like a bevel |
| Width tolerance | ±0.1 mm | Variation in width is visible along a long edge |
| Surface roughness on facet | Ra 0.1 to 0.4 µm | Lower reads brighter, tool wear pushes it up |
| Material | 6061 or 6082 plate, brass | Alloy affects how the facet looks after anodize |
| Anodize type after cutting | Type II, clear or light dye | A thin coat keeps the facet bright |
Width consistency matters more than the absolute number. A 1 mm chamfer that varies by 0.15 mm along a 430 mm panel edge looks wavy under a spotlight.
The three places the bright edge gets lost
Before the cut. If the roughing pass leaves a deep step or the part moves in the fixture, the diamond pass cannot hide it. The facet follows whatever surface is underneath. The shop needs a flat, stable part with the chamfer area already close to final size, so the diamond tool only removes a hair.
During anodizing. This is the common failure. Most anodize lines start with an alkaline etch that removes a thin layer of aluminum and leaves a matte surface. Applied to a diamond cut facet, it frosts the very edge you paid to make bright. Ask the anodizer whether the line etches, for how long and whether a bright dip or a shortened etch is possible for these parts. The better answer is usually a short etch and a thin coat, confirmed on a first article. The anodize guidance in our post on matching anodize colour across parts covers the colour side of the same step.
After anodizing. Anodize is hard but the bright facet shows every scratch. Parts that tumble against each other in a tray or travel loose in a box arrive with a hairline across the chamfer. Individual wrapping is part of the process, and the notes in packing finished audio parts apply directly.
What to put on the drawing
Four notes keep a quote honest.
- Call it out on the cosmetic face. Mark the edge with a callout that says diamond cut, give the angle and the width with its tolerance. Our guide to drawing callouts for cosmetic faces shows a layout that shops can read at a glance.
- Say what follows. State the anodize type, colour and whether the facet must stay bright through the process. If you leave this out, a shop may anodize with its standard etch and call the job complete.
- Name the viewing condition. Say that the edge is judged under angled light at arm’s length, not under a loupe. Without that, a shop has to guess how strict to be, and a guess costs money in one direction or the other.
- Define acceptable marks. A start and stop mark where the tool enters and exits is normal on an open edge. State where such marks may sit, for example at the panel corner and not in the middle of the edge.
Corners, short edges and what the tool cannot reach
The tool cuts best along a straight run. Three geometries need a conversation with the shop.
Outside corners at 90 degrees give a clean miter if the tool path is planned for them, but a rounded corner with a small radius makes the facet narrow or uneven on the curve. A corner radius under about 3 mm often forces a compromise.
Inside corners, such as the edge of a recessed window, usually cannot take a diamond cut chamfer at all, because the tool body cannot reach into the corner. If your design needs a bright edge there, expect a polished chamfer by hand or a redesign of the corner.
Short edges under about 20 mm run so briefly that the tool entry and exit marks take up a large share of the length. If the edge is on a knob or a button, the shop may suggest turning the chamfer on a lathe, which is a different and often cheaper process. The post on CNC volume knob manufacturing covers that route.
How the edge is inspected
A bright facet fails differently from a satin one. A satin edge hides small faults, so the usual check is a glance at normal distance. A diamond cut edge shows every fault, and the faults change with the angle of the light.
A sensible inspection looks at the edge under a single bright lamp, then tilts the part slowly through about 90 degrees. Three faults appear. Chatter shows as regular fine bands across the facet, caused by tool vibration or a worn tool. Dull patches show where the tool dragged instead of cutting, often at the start of a pass. Scratches show as thin bright or dark lines, almost always from handling after the cut.
Ask the shop to keep a reference piece, a real part that was accepted by both sides, and to compare production parts against it at the same angle and distance. The lighting side of this is covered in cosmetic inspection lighting and viewing distance, and the habit of approving a physical part before the run is the point of first article inspection for cosmetic parts.
A note on alloy choice
The alloy under the facet changes how it looks after anodizing. A common plate alloy gives a clean, even facet and a consistent clear anodize. Alloys with a high silicon content or coarse grain can show a faint mottled texture along a diamond cut edge even before anodizing, because the tool exposes the grain structure. If the design depends on a flawless bright edge, say so when you choose the alloy and read which aluminium alloys anodize well for audio parts before you commit to a material.
Use one lot of material for a single product run when you can. Plate from a different lot can anodize a slightly different shade, and a bright edge makes a shade difference between two panels easy to see when they sit side by side on a shelf.
Cost and quantity
Diamond cutting adds cycle time per part and a fixed setup for the tool and the fixture. At 30 pieces the setup is spread thinly and the pass can add a visible share of the part price. At 300 pieces the setup disappears into the average and the pass becomes a modest line. The general cost logic is in what an amplifier chassis costs to manufacture.
Two things lower the bill without changing the look. Keep the chamfer on the one edge people see, usually the top front, rather than all four edges. And keep the width consistent across product variants, so the shop reuses the same tool path and fixture.
Before you send the RFQ
- Chamfer angle, width and width tolerance are on the drawing
- The callout says diamond cut and names the viewing condition
- Anodize type, colour and etch requirement are stated
- Acceptable start and stop mark positions are marked
- Inside corners and radii under 3 mm are flagged for discussion
- Packing instruction says individually wrapped, no part-to-part contact
- First article with the real finish is requested before the full run
The same checklist feeds the finish spec builder, which turns these choices into a drawing note a shop can quote from. When the drawing is ready, send it through the RFQ form and we match it with up to 3 shops that can cut and finish a bright edge, with a reply within 24 business hours.
Frequently asked questions
Is a diamond cut chamfer a different process from a normal chamfer?
Yes. A normal chamfer is cut with a standard carbide chamfer mill as part of the main machining job and leaves a satin tool-mark finish. A diamond cut chamfer is a separate finishing pass with a diamond or polycrystalline diamond tool at high spindle speed, taking a very thin layer so the facet comes out bright and flat. Most shops price it as its own operation.
Can a diamond cut edge be anodized?
Yes, and that is the normal route on aluminum. The facet is cut first, then the part is anodized. The risk is the pre-treatment step, because a strong etch frosts the bright surface. Ask the anodizer whether the line etches, how long and whether a bright dip is available, then confirm on a first article.
Does the chamfer work on brass and copper as well as aluminum?
Brass cuts well with diamond tooling and gives a warm bright facet. Ferrous metals such as steel and stainless are a poor match for diamond tools because carbon in the work material wears the diamond quickly, so those parts are polished or ground instead.
Need a quote for this part?
Send the drawing. We match you with up to 3 shops and reply within 24 business hours.
Get matched with an audio parts shop