Guides / Choosing a Supplier
Cosmetic Inspection Lighting and Viewing Distance for Audio Parts
October 14, 2026
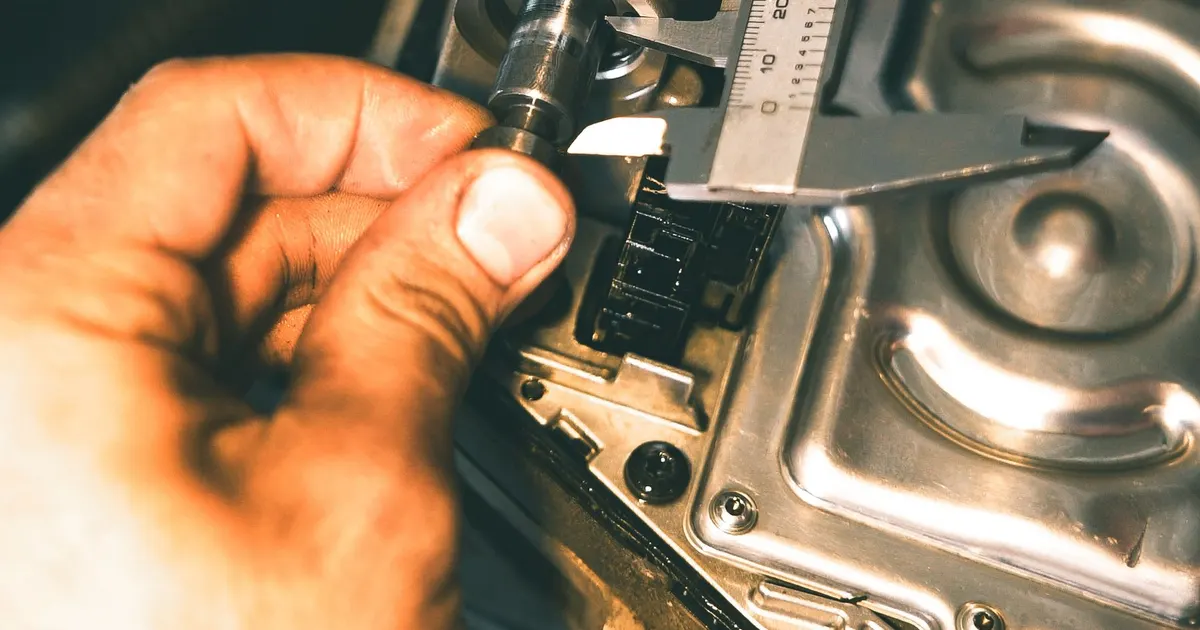
Most cosmetic disputes between a brand and a shop have nothing to do with the part. Both sides looked at the same faceplate and saw different things, because one stood under a window and the other held it under a desk lamp. A written inspection rule fixes that, and it costs nothing to write.
Why “no visible defects” fails
The phrase sounds strict and says almost nothing. A scratch that is plain under a raking lamp disappears under diffuse light. A colour difference between two panels shows under cool white light and vanishes under warm light. A dent seen from 200 mm is invisible from 600 mm.
If the rule does not state the conditions, the shop must guess how strict to be. A guess too loose means rejected parts at your end. A guess too strict means the shop scraps good parts and puts the cost into the next quote. Either way, the buyer pays.
The five variables to write down
A usable rule states five things.
- Viewing distance. How far the eye is from the part.
- Viewing time. How many seconds the inspector looks at each face.
- Light level and type. How bright, and what kind of light.
- Angle. Straight on, or tilted through a range.
- Zone. Which face or area the rule applies to.
Each one changes what an inspector sees, so each belongs in the specification.
Distance and time
Pick the distance from how the product is used.
- A faceplate on a shelf is seen at arm’s length, around 400 to 500 mm, usually for a few seconds.
- A knob, a cup or a remote is held and turned. A closer distance of 250 to 300 mm is fair, since the user’s hand and eye are that close.
- A rear panel is rarely seen, and a longer distance and shorter time are acceptable.
Time matters as much as distance. A part inspected for 30 seconds under a loupe will fail on defects that nobody sees in daily use. A common practice is a few seconds per face, which matches how a customer first picks up the product.
Light level and type
Light changes everything on a metal surface. A few practical rules apply.
- General inspection usually runs under bright, diffuse overhead light. Levels of 500 to 1000 lux are common for bench work, and fine visual detail often calls for more. Confirm the level your shop uses, and ask them to measure it with a lux meter on the inspection bench.
- Raking light from a low angle shows dents, waves and surface texture. It exaggerates faults, so use it as a diagnostic, not as the acceptance condition unless the product is genuinely viewed that way.
- Colour assessment needs a standard source. A daylight lamp of D65 or D50 type in a light booth removes the arguments caused by different shop and showroom lighting. A black anodize that looks matched in a warm workshop can show a brown shift under cool light.
Specify the lamp type for colour, and say which of the two approaches applies to each check. The colour side of this is explained in anodize colour matching for hi-fi.
Zones: not every face is equal
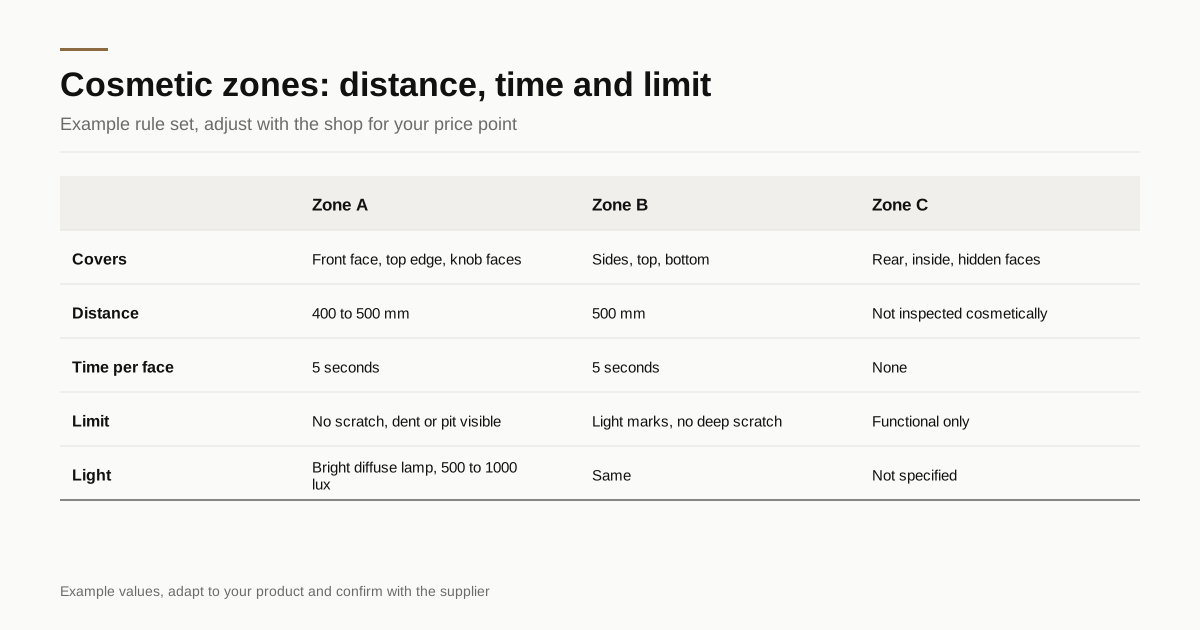
A part has areas that matter more than others. Many shops use a three-zone idea.
| Zone | What it covers | Distance and time (example) | Typical limit (example) |
|---|---|---|---|
| A | Front face, top edge, knob faces | 400 to 500 mm, 5 s | No scratches, dents or pits visible |
| B | Sides, top, bottom | 500 mm, 5 s | Light marks allowed, no deep scratches |
| C | Rear, inside, hidden faces | Not inspected cosmetically | Functional only |
The table gives examples, not standards. Set your own limits with the shop and adjust them to your price point. A premium amplifier may call for zone A on all faces seen in normal use, and a budget product may accept more.
The zone map belongs on the drawing as a simple annotated view. Drawing callouts for cosmetic faces shows the layout in detail.
Defect types and limits
Name the defects so everyone means the same thing.
- Scratch: a linear mark. Limit by length and by whether it can be felt with a fingernail.
- Dent or ding: a local depression. Limit by diameter and by whether it distorts a reflection.
- Pit or inclusion: a small hole or spot in the surface. Limit by count per area and by diameter.
- Streak or stain: a visible band in the finish, common in anodize. Limit by visibility at the agreed distance.
- Colour variation: a shift in shade between parts or within a part. Limit by comparison against a reference sample.
- Orange peel or haze: a texture in a polished or coated surface. Limit by comparison with a sample.
For each defect, one clear limit beats a paragraph. Examples of limits: “no scratch longer than 5 mm in zone A”, “no more than two pits under 0.3 mm in any 100 mm square of zone A”, “no dent that distorts a reflected line at 450 mm”. Numbers like these are examples for you to adapt, not industry standards.
A simple inspection kit
A shop does not need expensive equipment to inspect to a written rule. A basic kit costs little and removes most of the guessing.
- A tape measure or a marked stand, so the inspector’s eye is at the agreed distance
- A timer or a clock on the wall, since a few seconds is easy to overshoot
- A lux meter, which many phones imitate poorly, so a small dedicated meter is better
- A transparent defect gauge card with printed dot and line sizes, so a pit or a scratch is compared against a printed size and not judged by eye
- A fixed mounting angle, such as a stand that holds the part at about 45 degrees
- Clean cotton or nitrile gloves
A buyer who visits or receives a video can see at once whether the shop uses this kind of set-up. If the inspection happens on a cluttered workbench under a mixed light, expect disagreements on the first batch.
The reference sample
The most useful tool is a physical sample. Two parts are chosen by both sides: one accepted, called the golden sample, and one at the limit, the limit sample. The shop keeps one and the buyer keeps one. Disputes are settled by comparison under the agreed conditions, not by argument.
Samples age. Anodize can shift slightly in sunlight over months, and polished metal tarnishes. Store them in a sealed bag, away from light, and note the date. The review that creates the golden sample is the first article inspection for cosmetic parts.
The shop’s side of inspection
Ask the shop how it inspects, and look for five things:
- A dedicated inspection bench with controlled light, not an open workshop
- A lux meter and a written light level
- An inspector who does only inspection on the batch, not the machinist who made it
- Soft gloves and a soft mat, so the inspection does not add scratches
- A way to record and sort reject reasons, which feeds back into the process
A shop that already works this way is cheaper over time, since problems get caught before finishing, not after.
Common mistakes
Inspecting with the part held in the hand at a random angle. Fix a distance and an angle range.
Using a phone torch. A point light exaggerates every texture. Use a diffuse source.
Judging colour under mixed light. A window plus a fluorescent tube plus a lamp gives three colour temperatures on the same part.
Inspecting after packing. Parts should be inspected before they go in the box, and again at random after unboxing at the buyer’s end.
Accepting one inspector’s opinion. Where a part is borderline, a second person using the same conditions settles the question.
The packing step also matters, as covered in packing finished audio parts.
What to put in the RFQ and on the drawing
- Zone map: which faces are A, B and C
- Viewing distance and time per zone
- Light level, light type and angle
- Defect limits for the main types, in numbers where possible
- Reference sample plan: golden and limit samples, who keeps what
- Colour assessment method, with a standard light source
- First article with inspection before the full run
Add the same rule to your supplier agreement, so it applies to every batch. The finish spec builder includes cosmetic zones in its drawing note, which gives you a starting point. When you are ready, send the RFQ and we match it with up to 3 shops that work to a written cosmetic rule, with a reply within 24 business hours.
See also: cosmetic surface classes A, B and C and how to assign them.
Frequently asked questions
What viewing distance should I specify for a cosmetic part?
Match how the product is used. For a faceplate seen on a shelf, arm's length, around 400 to 500 mm, is a common choice. For a part held in the hand, such as a knob or headphone cup, a shorter distance of 250 to 300 mm is fairer. State the distance and the time allowed, for example 5 seconds per face.
Can a shop and a buyer disagree about the same part?
Easily, if the rule says only 'no visible defects'. Visible depends on lighting, angle, distance, time and the inspector's eyes. A rule with a distance, a light level, a zone and a defect size removes most of that disagreement.
Do I need a light booth?
For colour matching, yes, a standard light source such as a D65 or D50 daylight lamp avoids arguments caused by different lighting. For scratch and dent checks, a bright diffuse lamp and a raking light are enough.
Need a quote for this part?
Send the drawing. We match you with up to 3 shops and reply within 24 business hours.
Get matched with an audio parts shop